SHOP NOW, PAY LATER










 Informed Sport
 Informed Choice
 NSF Certified for Sport
 HASTA Certified

Choose a hydration pack if you need to drink hands-free for more than about two hours, carry more than a litre and a half, or tend to forget to drink. Choose bottles if you want to see exactly how much you have left, clean your gear in seconds, or you are out for under 90 minutes. Many experienced people carry both. The rest of this guide shows you how to decide, with evidence, and what to put in whichever container you pick.
TL;DR
- Packs make drinking easier, and one study of hikers found back-mounted system users drank far more than bottle users (2006 mL vs 877 mL over 4 hours).
- Bottles win on cost, cleaning and being able to see what is left. 63% of 485 surveyed day hikers chose them.
- Hygiene is not a deciding factor: research on outdoor users found no significant difference in bacterial contamination. Cleaning habits matter more.
- For sessions under 60 to 90 minutes, plain water is usually enough. Longer or hotter efforts call for sodium and carbohydrate in the mix.
Table of Contents
- The real difference: access, not capacity
- Hydration pack vs bottle: side-by-side comparison
- When a hydration pack is the better choice
- When a bottle is the better choice
- What about soft flasks?
- Is a hydration bladder less hygienic?
- How much should you actually drink?
- What goes in the container matters as much as the container
- Our view on pack vs bottle
- Stocking your bottle or pack
- How much water to carry in New Zealand conditions
- A simple way to decide
- FAQ
- Sources
The real difference: access, not capacity
A bottle and a pack hold water. The difference is how often you end up drinking it.
With a bladder, the tube sits by your shoulder. You sip while walking, riding or running without stopping, taking a hand off the bars or digging into a side pocket. With a bottle, each drink is a small decision, and on a hard climb or a technical descent many people simply skip it.
The research backs this up. In a 2004 study of hikers, people using back-mounted hydration systems drank 2006 ± 206 mL during four hours of hiking, against 877 ± 130 mL for bottle users, and kept their baseline hydration status better. It was one study with a small group, so treat it as a strong hint about behavior, not a law. But it matches what most of us see on the trail: easy access means more drinking.
That cuts both ways. More fluid is not always better, which we cover below.
Hydration pack vs bottle: side-by-side comparison
| Factor | Hydration pack (bladder) | Bottle (hard or soft flask) |
|---|---|---|
| Drinking access | Hands-free, sip anytime | Needs a free hand or a pocket reach |
| Capacity | Typically 1.5 to 3 L in one reservoir | 500 to 750 mL each, add more bottles to scale |
| Monitoring what is left | Hard: you must stop and check | Easy: you can see the level |
| Cleaning and drying | Fiddlier, tube and valve need attention | Quick, wide mouths are simple to scrub |
| Cost | Higher if you need a new pack as well | Usually lower |
| Refilling at a stream or tap | Slower unless you unpack | Fast, especially with a wide mouth |
| Adding powders or tablets | Possible, but residue is harder to clean | Easy to mix, shake and rinse |
| Best for | Long hikes, MTB, ultra and trail running | Short runs, road rides, gym, day walks |
The NZ-based hiking guide comparison lands in a similar place: bottles are durable and easy to refill but bulky, while bladders let you sip on the go but are harder to clean. It also notes that many hikers mix the two, for example a bladder for sipping and a bottle for dipping into a clean river.
When a hydration pack is the better choice
Long days out. Over three or four hours, carrying 2 to 3 litres in a single reservoir is simpler than juggling four bottles. The weight also sits close to your back, which is more stable on rough ground.
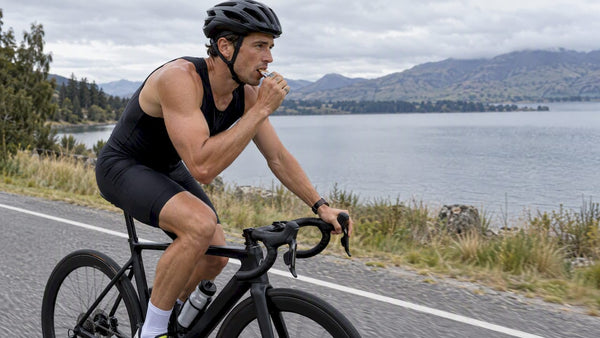
Technical terrain. On a mountain bike track or a rooty trail descent, you do not want to take a hand off the bars or poles. A tube you can reach with your mouth keeps you in control.
People who forget to drink. If you finish long sessions thirsty and under-fueled, easy access fixes the habit better than willpower does.
Hot conditions. When sweat rates climb, you need to drink regularly and have more volume available. A pack makes both easier.
Cold-weather days. In winter, a tube can freeze in the mountains. Blowing air back into the tube after each sip and keeping it under a jacket helps. Cold sweat losses are lower but not zero, and we cover that in our piece on electrolytes for cold-weather training.
When a bottle is the better choice
Short sessions. For gym work, a 45-minute run or an hour on the road bike, one or two bottles are plenty. New Zealand sports dietitian guidance says plain water is generally sufficient for sessions under 60 to 90 minutes. A full pack for a 5 km run is extra weight for no benefit.
You want to know what you have left. This is the bladder’s biggest weakness. SectionHiker’s survey and write-up points out that you cannot see your remaining volume without stopping and often unpacking. Running dry in the middle of a long day is a real risk, and it is why many experienced users combine both systems.
Cost and simplicity. A bottle costs less, goes in the dishwasher or gets scrubbed in a minute, and there is no tube, valve or bite piece to replace. Cost and ease of maintenance were among the main reasons the surveyed hikers gave for choosing bottles.
Mixing drinks. Electrolyte powders, tablets and carbohydrate drinks are easier to measure, shake and rinse out of a bottle. If you want different drinks on different legs of the same day, separate bottles let you do that.
Cycling on the road. Bottle cages are built into most bikes, which keeps weight off your back and your back cooler in summer. A back-mounted pack makes more sense on a mountain bike or on a bikepacking trip.
What about soft flasks?
Soft flasks sit between the two. They roll up when empty, fit in the front pockets of a running vest and let you see the level. They are lighter and more compact than rigid bottles, which is why trail runners often wear two up front instead of a bladder on the back. They are less durable than a hard bottle and some are harder to dry, but for racing and long runs they are a very good compromise.

Is a hydration bladder less hygienic?
This is the most common worry, and the evidence is reassuring. A study comparing bacterial colony-forming units in bottles and hydration bags among outdoor enthusiasts found no significant difference between them. What matters is how consistently you clean and dry the container.
Practical routine for either:
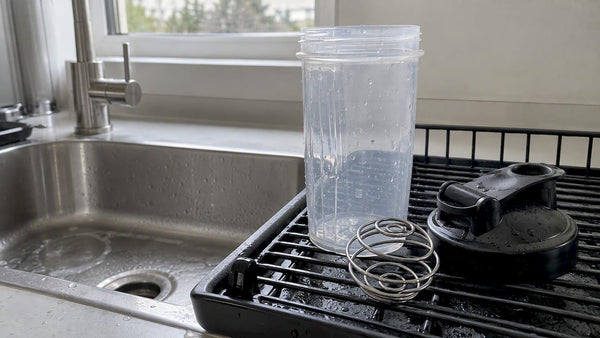
- Rinse after every use and empty it fully.
- Wash with warm water and mild detergent regularly, using a brush on the tube and valve if you have one. Manufacturers such as Mammut suggest rinsing with hot but not boiling water after each use and a deeper clean if you use anything other than water.
- Dry thoroughly before storing. For a bladder, turn it inside out and let it dry in a non-humid spot, away from direct sunlight.
- Use a diluted vinegar soak if limescale builds up, then rinse well.
If you put electrolyte or carbohydrate drinks in a bladder, wash it right after the session. Sugars feed whatever is growing in there. This is one reason many people keep their water in the pack and their flavored drink in a bottle.
How much should you actually drink?
A bigger reservoir is not a reason to drink more. Fluid needs depend on your sweat rate, the weather and how hard you work, so there is no single number that fits everyone. Reviews of drinking strategies suggest aiming to avoid body mass losses above 2%, while also noting that overdrinking carries its own risk.
That risk is hyponatraemia, where blood sodium is diluted by excess water. An Auckland sports dietitian warns against a “drink as much as possible” mindset and recommends matching intake to your tested sweat rate. If you have had cramps, confusion, nausea or a swollen feeling during or after long events, or you have a heart or kidney condition, speak to your GP or a sports dietitian before building a fluid plan.
Work out your own sweat rate
The same dietitian guide describes a simple test you can run with the gear you already own:
- Weigh yourself right before a session, after emptying your bladder.
- Weigh your bottles or pack before you start (1 g equals 1 mL).
- Train as you normally would and note what you drink.
- Weigh yourself again afterwards, and weigh your bottles or pack.
- Work out the difference in body mass plus the fluid you drank, divided by the hours trained.
Do this in a few different conditions: a cool morning, a hot afternoon and a hard session. You will end up with a range you can plan around, and you will know whether one litre is enough or whether you need a 2-litre pack.
What goes in the container matters as much as the container
For most sessions the answer is plain water. New Zealand health authorities promote tap water as the healthiest and most sustainable choice, and warn that sugary sports drinks add unnecessary energy and dental risk for casual exercisers.
Things change when the session is long, hot or hard. Sports drinks are recommended for prolonged, high-intensity endurance events where you need carbohydrate, fluid and electrolytes together. That is where your choice of container interacts with your fuel plan:
- Under 60 to 90 minutes: water in a bottle is usually fine. See our guide on electrolytes vs sports drinks for 60 to 90 minute sessions.
- Long or hot sessions: add sodium. Our guide to sodium for hydration walks through the range endurance athletes use, and our hydration powder ranking compares products by sodium content.
- Choosing a format: hydration tablets vs powder depends on session length and how you carry things. Tablets are easy to drop into a bottle on the trail.
- Avoiding sugar: if you prefer a sugar-free option, see our electrolyte powder with no sugar buyer guide.
- Fuel on the go: if you are racing, you may want carbohydrate from solids too. See gels vs chews.
A sensible setup for a long trail run or day hike is water in the pack for steady sipping, and a bottle or two of electrolyte drink up front where you can see how much you have used.
Our view on pack vs bottle
We stock supplements, not hydration gear, so we have no reason to push you toward either. What we see from the training side is that most people choose the wrong container for their session, not the wrong one in general.
The common mistakes: wearing a full 3-litre pack for a one-hour run, using a bladder for sugary drinks and not washing it, and filling a bottle with electrolyte mix for a 40-minute gym session that only needed water. Another is ignoring sodium on a long hot day because the container is full of water.
Our rule of thumb is simple. Under 90 minutes, use a bottle and water. Beyond that, think about a pack or a vest with soft flasks, and think about what is in it. Stay with a routine you can keep up, because a clean bottle you actually drink from beats an expensive pack that sits in the cupboard. Our products are sourced direct and stored in New Zealand, and our staff train themselves, so we test these habits on ourselves before we recommend them.
— Blake
Stocking your bottle or pack
If you have settled on a setup and need something to put in it, our electrolyte range sits alongside protein, creatine, amino acids and other categories, all with ingredient lists disclosed in full. If you prefer sachets for a pack-friendly format, our guide to electrolyte sachets in NZ covers how many per day make sense. You can also browse the full category page for amino and BCAA options and more.
How much water to carry in New Zealand conditions
New Zealand weather changes fast, and the water you need for a walk in the Waitākere Ranges is not the water you need on the Tongariro Crossing. Hiking New Zealand cites the Mountain Safety Council guideline of around two litres of water a day as a baseline, and notes that hot weather, steep climbs or a heavy pack push that up.
Some practical points for local conditions:
- Refill points: on many tracks you can top up from huts or streams, so a smaller carry plus a way to treat water can beat hauling 3 litres all day. A wide-mouth bottle is faster at a stream than a bladder in a pack.
- Summer sun: UV and heat raise your sweat rate. Pack more, and add sodium on long days.
- Winter and alpine days: you may drink less, but you still lose fluid. Keep a bottle where it will not freeze, and carry a warm drink if conditions call for it.
- Plastic in the heat: health reviews note that avoiding plastics in hot conditions matters more for chemical exposure than worrying about trace microplastics. Do not leave a plastic bottle or bladder baking in a hot car.
A simple way to decide
Ask yourself four questions:
- How long is the session? Under 90 minutes: bottle. Over 2 hours: consider a pack or vest.
- Can I easily reach and see my bottle? If not on your bike or on technical ground, a tube helps.
- Am I likely to forget to drink? Pick the format that makes drinking effortless.
- What am I putting in it? Plain water works in either. Sweet or powdered drinks go in a bottle you can rinse easily.
If you answer “pack” on two or more, go with a pack, and add one bottle for monitoring and electrolytes. Otherwise stick with bottles.
FAQ
Are hydration packs better than water bottles?
Neither is better across the board. Packs make drinking easier and carry more in one place, which helps on long or technical outings. Bottles are cheaper, easier to clean and let you see how much you have left, which suits shorter sessions.
Are hydration bladders harder to keep clean?
They take more effort because of the tube and valve, but research on outdoor users found no significant difference in bacterial contamination between bladders and bottles. Rinse after each use, wash regularly and dry the bladder fully, stored inside out.
Can I put electrolytes or sports drinks in a hydration bladder?
You can, but sugary and flavored drinks leave residue that is harder to remove from a bladder and tube. Many people keep plain water in the pack and mix electrolytes in a bottle. If you do use a bladder for mixed drinks, wash it straight after the session.
How much should I drink during exercise?
It depends on your sweat rate, the weather and your effort, so there is no universal figure. Aim to avoid losing more than 2% of body mass, and avoid drinking far beyond thirst, because overdrinking can cause hyponatraemia. A sports dietitian can help you test your own rate.
Sources
- Hiking Hydration Systems vs. Water Bottles: Survey Results, SectionHiker
- The Influence of a Back Mounted Hydration System on Fluid Homeostasis during Hiking
- A Comparison of Bacterial Colony-Forming Units in Water Bottles and Hydration Bags Among Outdoor Enthusiasts
- Hydration & Electrolytes Guide for Athletes, Auckland Sports Dietitian
- Drinking Strategies: Planned Drinking Versus Drinking to Thirst, Nutrition Evidence Database
- Behind the hype: sports drinks, HealthEd
- How much water to take on a hike, Hiking New Zealand
- What is a hydration bladder? Buyer’s guide, Mammut
- PubMed Central